
St. Albert Drywall Repair
Expert Drywall Repair Company in St. Albert, Alberta
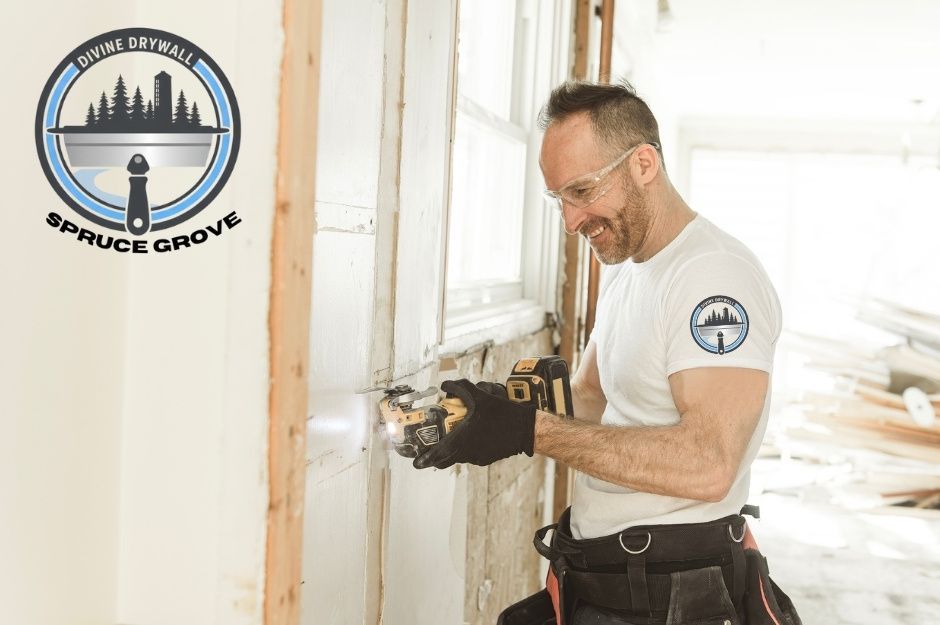
When your St. Albert home suffers from cracked walls, water damage, or unsightly holes, finding the right drywall repair contractor becomes essential for restoring your property's appearance and value. Divine Drywall Spruce Grove offers comprehensive services, including crack repair, patching, water damage restoration, popcorn ceiling removal, complete installation, and expert finishing techniques.
Your choice of contractor can make the difference between a seamless repair that blends perfectly with existing walls and a patchy job that stands out. St. Albert's drywall specialists serve a growing community of over 66,000 residents in Alberta's second-largest city within the Edmonton Metropolitan Region, handling everything from historic homes near Mission Hill to modern developments adjacent to Edmonton's northern boundary. These specialists handle everything from minor crack fixes to major water damage restoration, ensuring your walls and ceilings return to their original condition.
Whether you need emergency repairs after flooding, want to modernize with popcorn ceiling removal, or require complete drywall installation for renovations, understanding the available services and techniques will help you make an informed decision for your property. St. Albert's location along the Sturgeon River means contractors are particularly experienced with moisture-related issues common to properties near the river valley.

Divine Drywall Spruce Grove (Home Page)

Key Drywall Repair Services in St. Albert, AB
St. Albert contractors specialize in comprehensive drywall repair solutions, from minor patching to complex restoration projects. These services address common issues like holes, cracks, water damage, and outdated ceiling treatments.
Patching and Small Hole Repair
Drywall patching addresses holes caused by nails, screws, doorknobs, and minor impacts. Professional contractors use mesh patches for holes smaller than three inches and cut-in patches for larger openings.
The repair process involves cleaning the damaged area, applying the appropriate patch material, and feathering compound to blend seamlessly with existing walls. Small nail holes require simple filling and sanding.
Common patching materials include:
- Self-adhesive mesh patches
- Paper tape with joint compound
- Cut-in drywall pieces
- Quick-setting patching compound
Quality contractors ensure patches are invisible once painted. They match existing wall texture and use proper drying times between coats for durable results.
Crack Repair Solutions
Wall cracks develop from settling, temperature changes, or structural movement. St. Albert contractors identify crack causes before beginning repairs to prevent recurrence. In St. Albert, where the city expanded rapidly during the 1980s when it became immediately adjacent to Edmonton, many homes from this era experience settling-related cracks that require professional assessment.
Surface cracks need mesh tape and joint compound application. Deeper structural cracks may require professional assessment and specialized repair techniques.
Crack repair involves:
- Cleaning loose debris from cracks
- Applying primer to bare surfaces
- Installing mesh tape over compound
- Sanding smooth when fully dry
Contractors provide transparency about crack severity and realistic expectations for repair longevity. Some cracks may reappear due to ongoing structural movement.
Plaster Repair and Restoration
Older St. Albert homes often feature plaster walls requiring specialized restoration techniques. Plastering repairs address chips, holes, and deteriorating surfaces while maintaining the original wall character. Properties in the historic Mission Hill area, where St. Albert was founded in 1861 as a Métis settlement by Father Albert Lacombe, often contain original plaster work that requires careful restoration to preserve the community's heritage character.
Three-coat plaster systems include scratch coat, brown coat, and finish coat applications. Each layer requires proper curing time and technique for lasting results.
Contractors match existing plaster texture and composition. They use lime-based or gypsum-based products depending on the original installation method. St. Albert received town status in 1904 and was reached by the Canadian Northern Railway in 1906, meaning many century-old buildings still stand and require specialized plaster restoration techniques that respect their historical significance.
Water-damaged plaster needs complete removal and replacement in affected areas. Professional assessment determines whether partial or full wall restoration is necessary.
Popcorn Ceiling Repair and Removal
Popcorn ceiling repair addresses damaged textured areas through patching or complete removal services. Many homeowners choose removal for updated aesthetics and easier maintenance.
Contractors test older popcorn ceilings for asbestos before beginning work. Safe removal requires plastic sheeting, proper ventilation, and specialized disposal methods.
Removal process includes:
- Room preparation and protection
- Texture scraping after water application
- Surface smoothing and priming
- New finish application
Customer service focuses on minimizing dust and debris during removal projects. Professional contractors complete a thorough cleanup and provide timeline expectations for multi-room projects.
Partial repairs match existing texture using spray-on compounds. This option works for small damaged areas where full removal isn't desired.
Addressing Water Damage and Ceiling Issues
Water damage to drywall requires immediate attention to prevent mold growth and structural problems. St. Albert's proximity to the Sturgeon River makes properties in the river valley particularly vulnerable to water damage from flooding, high water tables, and elevated humidity levels. Professional contractors in St. Albert handle both emergency water damage repairs and ceiling issues like sagging, staining, and texture restoration.
Drywall Water Damage Repair
Water damage creates multiple problems that require specialized repair techniques. You need to address moisture sources first before beginning any restoration work.
Assessment and Documentation:
- Locate water source and stop active leaks
- Document damage extent for insurance claims
- Test moisture levels in surrounding areas
Professional contractors use moisture meters to identify hidden damage behind walls. They remove affected drywall sections completely rather than attempting surface repairs. St. Albert contractors are particularly experienced with basement water damage in homes built during the city's rapid expansion, when it grew from a small community originally separated from Edmonton by farmland into Alberta's second-largest city in the metropolitan region.
Repair Process: The restoration involves cutting out damaged sections, treating exposed framing, and installing new drywall. Contractors apply antimicrobial treatments to prevent mold growth.
Texture matching becomes critical for seamless repairs. Experienced professionals recreate original wall textures using spray applications or hand techniques.
Timeline and Transparency: Most water damage repairs take 3-5 days including drying time. Quality contractors provide detailed timelines and keep you informed throughout the process.
Ceiling Repair for Stained or Sagging Surfaces
Ceiling problems often indicate underlying structural issues that require professional evaluation. Sagging sections pose safety risks and need immediate attention.
Common Ceiling Issues:
- Water stains from roof leaks or plumbing
- Nail pops from settling or temperature changes
- Sagging from moisture or inadequate fastening
- Texture damage from age or impact
Repair Techniques: Contractors use different approaches based on damage severity. Minor stains require primer-sealing and repainting. Sagging areas need additional fasteners or complete section replacement.
Professional Assessment: Experienced contractors examine ceiling joists and structural support before beginning repairs. They identify whether problems stem from foundation settling, roof issues, or installation defects.
Customer Service Standards: Quality contractors explain repair options clearly and provide written estimates. They protect your furniture and flooring during overhead work and maintain clean work areas.
Professional Drywall Installation Services
Professional drywall installation requires precise measurement, proper material selection, and expert technique to create seamless walls and ceilings. St. Albert contractors integrate framing preparation with insulation work and provide customized solutions for both residential and commercial projects. Serving a community that originated as a Métis settlement named after Saint Albert of Louvain in 1861, today's contractors work on diverse projects from heritage preservation to modern commercial developments in Alberta's growing northwestern corridor.
New Wall and Ceiling Installation
Professional drywall installation begins with accurate measurements and material calculations. Contractors use standard 4x8 or 4x12 foot sheets, selecting appropriate thickness based on your project requirements.
The installation process involves securing drywall sheets to wall studs and ceiling joists using screws spaced 12-16 inches apart. Proper screw depth prevents paper tearing while ensuring secure attachment.
Key installation steps include:
- Measuring and cutting sheets to fit
- Creating precise cutouts for electrical outlets and fixtures
- Aligning seams properly to minimize visible joints
- Installing corner beads for clean edges
Quality contractors ensure sheets are level and properly aligned before securing. They check for gaps or uneven surfaces that could affect the final appearance.
Professional installation eliminates common issues like sagging ceilings or visible seams. Your contractor will verify all fasteners are properly countersunk before beginning the finishing process.
Framing and Insulation Integration
Drywall installation coordinates closely with framing and insulation work to create properly functioning wall systems. Contractors verify framing is square and properly spaced before beginning installation. Alberta's climate requires robust insulation standards, and St. Albert contractors understand the specific R-value requirements for the Edmonton Metropolitan Region's cold winters, where temperatures regularly drop well below freezing.
Insulation considerations include:
- Ensuring insulation fills cavities completely
- Avoiding compression that reduces R-value
- Installing vapor barriers correctly
- Maintaining proper clearances around electrical components
Professional installers work around existing insulation without disturbing its placement. They identify and address any framing irregularities that could affect drywall alignment.
Electrical and plumbing rough-ins must be completed before drywall installation. Your contractor coordinates with other trades to ensure proper sequencing and avoid delays.
Proper integration prevents thermal bridging and ensures your building envelope performs efficiently. Professional installation maintains insulation integrity while creating smooth wall surfaces.
Custom Solutions for Residential and Commercial Spaces
Residential drywall installation focuses on living comfort and aesthetic appeal. Contractors select appropriate materials for different rooms, considering moisture levels and usage patterns.
Residential applications include:
- Standard living areas using 1/2-inch drywall
- Bathrooms requiring moisture-resistant materials
- Garages needing fire-rated assemblies
- Basements with potential moisture concerns
Commercial projects require different specifications and often involve fire-rated assemblies. St. Albert's commercial sector serves the second-largest population center in the Edmonton Metropolitan Region, requiring contractors experienced with retail spaces, office buildings, and institutional facilities that meet Alberta's commercial building codes.
Commercial considerations include:
- Fire resistance ratings
- Sound transmission requirements
- Impact resistance in high-traffic areas
- Accessibility compliance
Professional contractors provide transparent pricing and clear timelines for both residential and commercial projects. They maintain consistent customer service throughout the installation process.
Your contractor will recommend appropriate materials based on your specific application and budget requirements. They ensure all installations meet local building codes and manufacturer specifications.
Expert Drywall Finishing Techniques
Professional drywall finishing requires precise taping and mudding techniques to create seamless surfaces. Texture application and proper surface preparation form the foundation of high-quality results.
Taping and Mudding for Seamless Surfaces
Paper tape provides the strongest bond for flat joints, while mesh tape works better for repairs and patches. You'll need to apply three coats of joint compound for professional results.
The first coat embeds the tape and fills the joint. Apply compound evenly using a 6-inch knife, pressing firmly to eliminate air bubbles.
Your second coat extends beyond the first by 2-3 inches on each side. Use an 8-inch knife for smoother transitions and feather the edges carefully.
The final coat requires a 10-12 inch knife and should extend 4-6 inches beyond the previous layer. Transparency in pricing matters when contractors explain this multi-step process to you.
Sand lightly between coats only when necessary. Over-sanding creates more work and can damage the underlying surface.
Customer service includes explaining why three coats are essential for durability and appearance, not just contractor preference.
Texture Application and Surface Preparation
Surface preparation determines texture quality and longevity. Prime all new drywall and repairs before applying any texture material.
Orange peel texture requires a spray gun with proper air pressure settings. Too much pressure creates heavy texture, while insufficient pressure produces inconsistent coverage.
Knockdown texture involves spraying the surface first, then lightly flattening high spots with a trowel. Timing is critical - wait 10-15 minutes before knocking down.
Plastering techniques for smooth wall finishes require multiple thin coats rather than single thick applications. Each coat must dry completely before the next application.
Protect adjacent surfaces with plastic sheeting and painter's tape. Remove masking materials while the texture remains slightly damp for clean edges.
Temperature and humidity affect drying times significantly. St. Albert's climate in the Edmonton Metropolitan Region experiences significant temperature variations, with ideal drywall finishing conditions of 65-75°F with 40-60% humidity being most achievable during spring and fall months. Ideal conditions are 65-75°F with 40-60% humidity for consistent results.
